How to mount two PS3 Eyes to create a stereo camera |
|
|
| Posted: 13 October 2010 01:32 PM |
[ Ignore ]
|
|
|
New Member
Total Posts: 5
Joined 2010-09-24
|
Hi all,
I need help & ideas on how to mount two PS3 Eyes to create a stereo camera.
I am currently thinking of mounting it somewhat similar to the image below

but instead of using a 3D printer to create such a “casing”,
I plan to use mounting brackets like the images below
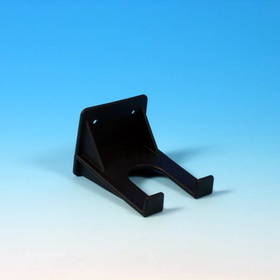

followed by “screwing” them onto a flat platform (aluminium / steel).
Unfortunately…I find it “extremely” difficult to find mounting brackets with an “exact fit” to the PS3 Eye’s various parts.
I am sincerely hoping for ideas & suggestions on how to “easily” mount two PS3 Eyes to create a stereo camera.
I currently do not plan on “dismantling” the PS3 Eye’s casing though…unless neccessary/recommended.
|
|
|
|
|
|
| Posted: 14 October 2010 12:32 AM |
[ Ignore ]
[ # 1 ]
|
|
|
Member
Total Posts: 76
Joined 2010-08-03
|
Given that the base plate is metal. magnets might not be a bad idea, however you would still need to find out a way of immobilising the head from tilting/panning. I will be doing something quite similar in the upcoming months, however I plan on removing the casings on my cameras as mounting through the PCB holes seems an easier solution for my intentions.
If you would like something more pliable you could maybe look into shapelock/polymorph which are thermosetting plastics you can work with by hand. Its great stuff for one off fabrications and prototyping.
http://www.youtube.com/watch?v=sfcBWnOqr6s
Let us know how you get on with this, It would be great to see what you come up with 
Khaled
|
|
|
|
|
|
| Posted: 14 October 2010 03:32 AM |
[ Ignore ]
[ # 2 ]
|
|
|
New Member
Total Posts: 5
Joined 2010-09-24
|
Thanks for the suggestion, kshaaban
Yeah…it is a pain trying to figure out how to immobilize the head from tilting/panning.
Actually, I plan to attach my stereo camera onto my own pan/tilt mechanism,
so I might end up having to “dismantle” the PS3 Eyes to get their PCBs out as well :p
I am just hoping that there is a way to mount the PS3 Eyes without “dismantling” it,
because I worry I might end up breaking the PCB during the “dismantling” process :p
Was it easy to dismantle the PS3 Eye?
Or anyone ever tried mounting the PS3 Eye without dismantling it?
|
|
|
|
|
|
| Posted: 14 October 2010 04:52 AM |
[ Ignore ]
[ # 3 ]
|
|
|
Member
Total Posts: 76
Joined 2010-08-03
|
There are videos of de constructing the camera you can on youtube if that becomes a necessity.
Just thinking about how to mount them you could probably try to use some form of clamping mechanism to hold them in place. Ive drawn up a quick illustration to demonstrate.

So the silver parts are threaded rods (one on the front under the microphone array and two on the back), these should be easy to source. The red parts are metal/plastic/wood plates. you could either thread these plates or drill holes. Then you could just use nuts and washers to tighten behind each one.
To keep the cameras secure you might want to back the plates with some sort of foam/rubber padding or wadding (whatever is at hand)
The nice part of this is you could potentially use the nuts on the threaded rod to adjust the distance between the two cameras as and when required. I’m not sure how or what you wish to mount it on to or if this is the sort of thing your after, but it means the cameras are isolated from their bodies and the bases are left to dangle.
Khaled
|
|
|
|
|
|
| Posted: 14 October 2010 10:15 AM |
[ Ignore ]
[ # 4 ]
|
|
|
New Member
Total Posts: 13
Joined 2010-05-10
|
One of the issues you will run into is the Inter-Ocular distance between center of lenses will not allow going down to 66mm, (this is common in stereoscopy)
This is due in part to the Microphone Array.
I have used Plastic C-Clamps and a simple crossbar on a Pan/Tilt head with a small ledge to allow the top of the camera, and back of camera (Microphone array) to register with something. (In this case a Metal Ruler) Simple, requires no dissassembly, and does work for most Stereo, but the Inter-Ocular is a Pain for Sub 45mm lenses. (8mm Film Cameras use sub-48mm lenses, and you end up needing to get the interocular tighter then 66mm, due to the fisheye issues with same.)
Small Aluminum angle stock and Plastic C-Clamps and some nuts-bolts and screws, you can fashion an interesting rig.
-sean
|
|
|
|
|
|
| Posted: 14 October 2010 10:29 AM |
[ Ignore ]
[ # 5 ]
|
|
|
Member
Total Posts: 76
Joined 2010-08-03
|
That’s a very good point Sean.
Slightly off topic but do you have or know of any websites, papers or journals which support this?
I’m currently doing some research work on stereoscopic imagery so it could save me a trawl
Khaled
|
|
|
|
|
|
| Posted: 14 October 2010 05:18 PM |
[ Ignore ]
[ # 6 ]
|
|
|
New Member
Total Posts: 13
Joined 2010-05-10
|
Wiki Stereoscopic Cinema for starters.
Then read about: http://www.lennylipton.com/
Then later do a Search for SMPTE365.
-sean
|
|
|
|
|
|
| Posted: 14 October 2010 08:47 PM |
[ Ignore ]
[ # 7 ]
|
|
|
New Member
Total Posts: 5
Joined 2010-09-24
|
Thanks Khaled for the (once again) great suggestion!
But I have already “dismantled” my PS3 Eyes :p
Then I saw that the PS3 Eye’s casing’s back panel has some spacing away from the PCB.
I am currently planning to drill a few holes into the back panel to screw it onto a flat aluminium/steel/plastic platform.
I also plan to remove the PS3 Eye’s “pan/tilt” to reduce unnecassary weight
as well as to increase its aesthetics to make it look more like eyeballs :p
When I finish mounting it, I’ll post pictures
Hopefully, it will help others who struggled to mount this PS3 Eyes (or maybe I’m the only one struggling…)
|
|
|
|
|
|
| Posted: 15 October 2010 04:09 AM |
[ Ignore ]
[ # 8 ]
|
|
|
Member
Total Posts: 76
Joined 2010-08-03
|
@sean - Big thanks, I always find it hard to begin research but once I get going it usually snowballs :D
@kenmei84 - Look forward to seeing your construction steps!
|
|
|
|
|
|
| Posted: 17 October 2010 07:32 AM |
[ Ignore ]
[ # 9 ]
|
|
|
New Member
Total Posts: 7
Joined 2010-06-21
|
Here is my setup for my recent development of a stereo system
The mounting PCB has two M6 holes whose center are aligned with that of PS3 lens, ONE 1/4 hole at the center of the lens for mounting it on a tripod. Four M2 holes for other mounting options.
The picture shows two cameras mounted on an aluminum bar—available on ebay, I think they call it 8020 or something.
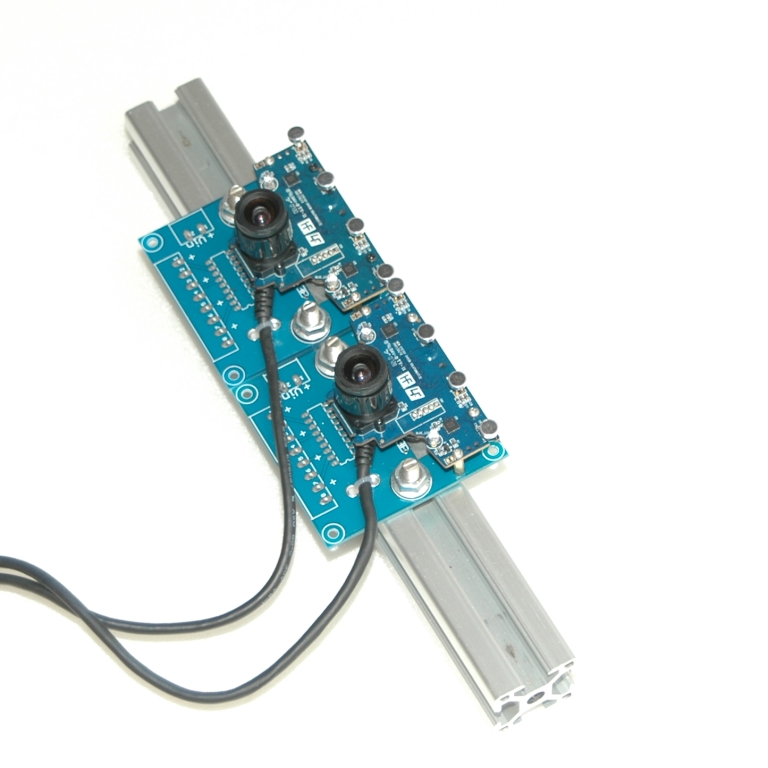
Image Attachments

Click thumbnail to see full-size image
|
|
|
|
|
|
| Posted: 25 October 2010 07:16 AM |
[ Ignore ]
[ # 10 ]
|
|
|
New Member
Total Posts: 15
Joined 2010-10-10
|
i have 8 cmaeras and i used this method from NUI site
http://nuigroup.com/forums/viewthread/9473/
i had the cases made locally by a laser cutting company and the worked perfectly first time. only thing to add is maybe put some tape arond the edge to stop and excess ir light coming in. This was the only problem i had.
|
|
|
|
|
|
| Posted: 25 October 2010 07:27 AM |
[ Ignore ]
[ # 11 ]
|
|
|
New Member
Total Posts: 15
Joined 2010-10-10
|
|
|
|
|
|
|
| Posted: 26 October 2010 11:29 PM |
[ Ignore ]
[ # 12 ]
|
|
|
New Member
Total Posts: 5
Joined 2010-09-24
|
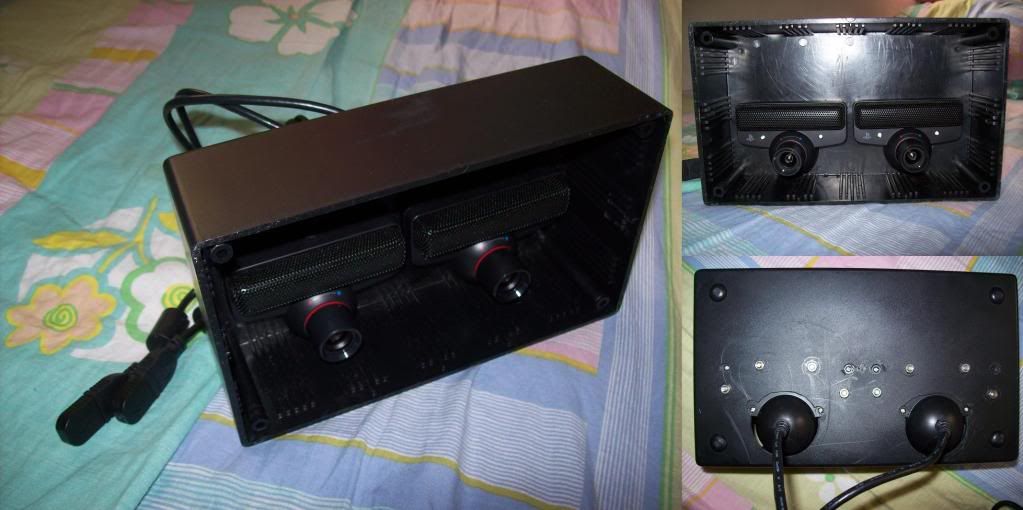
Hello again
I have finally made my stereo camera!
Tools/Materials Required:
1) Drill
2) Drill Bits (http://en.wikipedia.org/wiki/Drill_bit)
3) Hole Saw (http://en.wikipedia.org/wiki/Hole_saw)
4) Project Box
5) Screws & Nuts
First, I dismantled the PS3 Eye’s casing and removed the unncessary pan/tilt base.
Next, I cut 2 holes into the Project Box to allow inserting the PS3 Eye’s “rounded back casing” into the holes.
Then, I drilled 4 holes into the back of each PS3 Eye’s casing,
and I drilled 8 holes into the back of the Project Box to allow installing the 8 “mounting screws”.
Lastly, I drilled 8 larger holes into the Project Box to allow accessing the PS3 Eye’s casing’s original screw holes
to allow me to later screw back the PS3 Eye’s casing.
The result is a stereo PS3 Eye with its original casing “almost” intact
|
|
|
|
|
|
| Posted: 12 November 2010 12:58 PM |
[ Ignore ]
[ # 13 ]
|
|
|
New Member
Total Posts: 5
Joined 2010-09-24
|
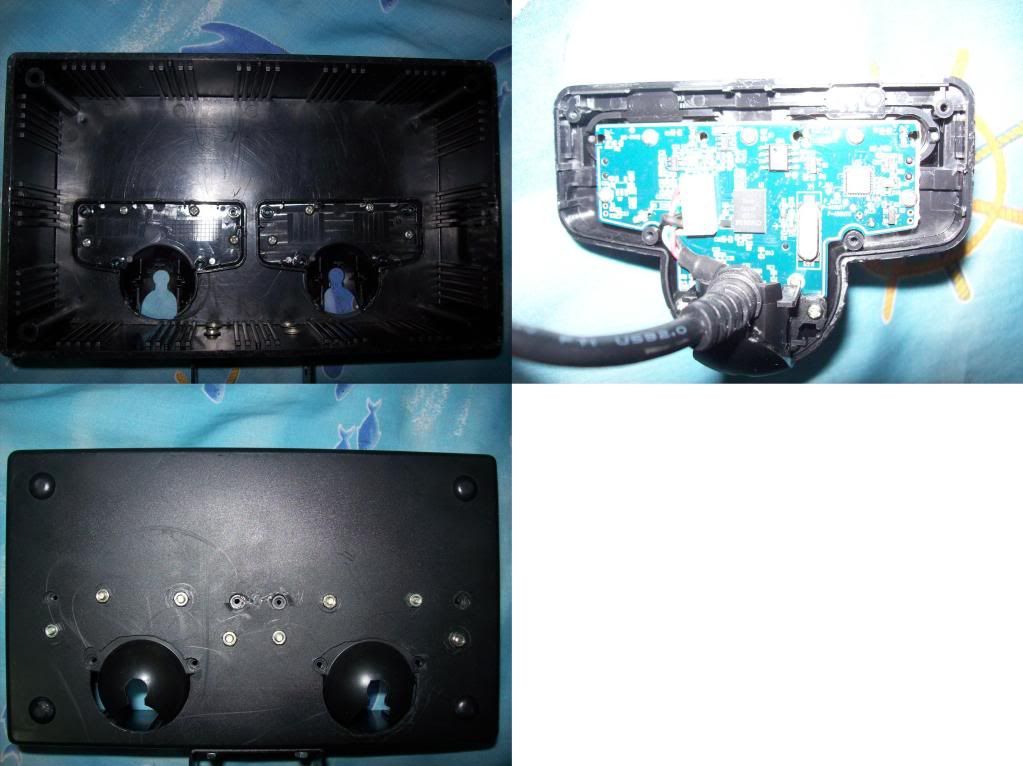
Here are a few pictures of my stereo camera’s internals
if it helps (to anyone who is interested) in visualizing where I drilled the neccessary holes
Also, I just finished building my own pan/tilt mechanism, to make my robot’s head
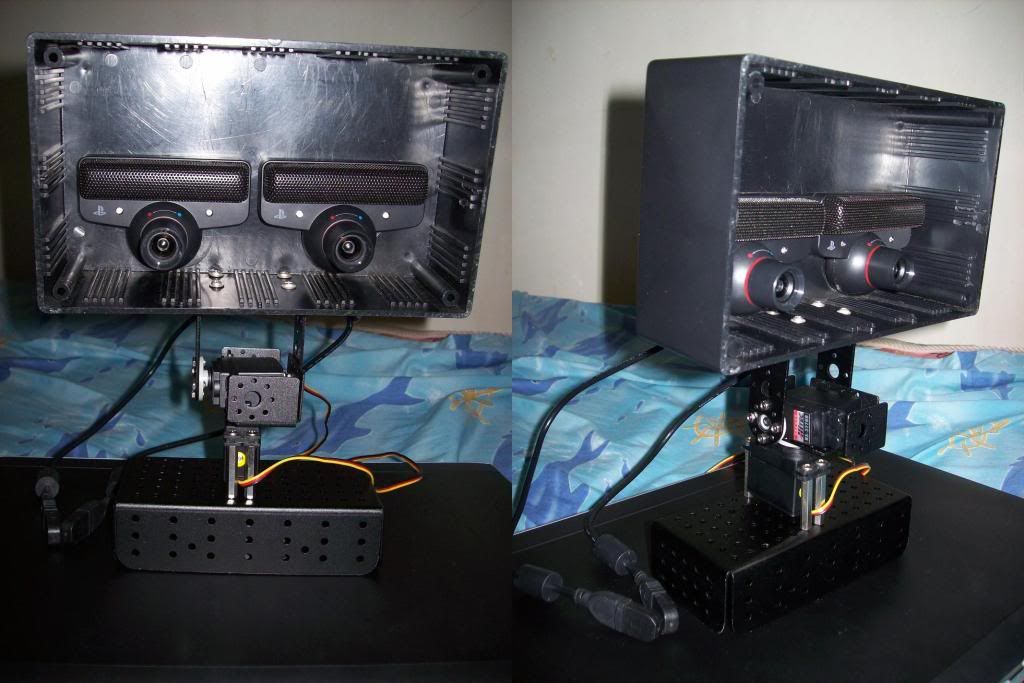
So now my robot has both eyes & ears (& neck) :p
|
|
|
|
|
|
| Posted: 24 November 2010 11:58 PM |
[ Ignore ]
[ # 14 ]
|
|
|
New Member
Total Posts: 1
Joined 2010-11-23
|
|
|
|
|
|
|
| Posted: 10 January 2011 06:50 AM |
[ Ignore ]
[ # 15 ]
|
|
|
Member
Total Posts: 76
Joined 2010-08-03
|
Sid Sloth - 25 October 2010 07:16 AM i have 8 cmaeras and i used this method from NUI site
http://nuigroup.com/forums/viewthread/9473/
i had the cases made locally by a laser cutting company and the worked perfectly first time. only thing to add is maybe put some tape arond the edge to stop and excess ir light coming in. This was the only problem i had.
Do you have any pictures of your build?
looking into potential builds but not entirely sure on what to go with yet.
-KS
|
|
|
|
|